These two were colored with PanPastels. Even though it is a dry medium, the color can be picked up and applied with a wet brush. As you can see, the result is much like using watercolors. We were almost done when we realized that Ellen went for the bright colors and Alta achieved a softer look. We had so much fun coloring and look forward to incorporating these "beauties" into finished projects. Stay tuned...
Latest News
Wednesday, April 30, 2014
Make time to color...
Monday, April 21, 2014
Embellishing with laser cut wood...
Enhance your handmade projects with these intricate
laser-cut wood embellishments. Alter them with colorful paints, stains, glitter,
spray mists or rhinestones to create a dazzling visual display. You can stamp
on them or use your favorite chalks or PanPastels to add a hint of texture and
color. Add them on your scrapbook pages,
greeting cards, home decor accessories and more to add delightful decorative
touches. Painted, papered or plain, these 2 mm cut outs will add a dimensional
flair to all your crafty creations. And don't forget...the boxes are made out of wood and can be decorated too!
These are the assortments that we have listed from Prima Marketing. These collections contain 36 pieces in each divided box and sell for $5.75. Each piece figures out to be approximately .16 each.
You can find these and other crafty goodies in our Etsy Shop. Click HERE to start shopping...
Friday, April 18, 2014
PEEPS and Pinterest...
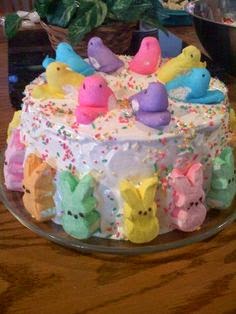
How did crafty, creative people ever exist without Pinterest?...The ideas we pin to our "boards" help us, and even the not so crafty, have FUN and festive holidays. Here's a few "PEEPS" from Pinterest to perk up your Easter dinner table and gift giving...Enjoy!
Thursday, April 17, 2014
What would you MONOGRAM???...
Vinyl monogram decals are making it easy to personalize all those things that can't be embroidered. They are easy to apply and remove and can be applied
to virtually any smooth surface including (but not limited to) plastic,
glass, metal, windows, cars, smooth woods, candles...the list goes on! You can stick them on your car, your
cell phone, mp3 player, laptop, iPAD, even the walls in your home! Are you planning a vacation?...Quickly identify your luggage with your personal monogram sticker! Monograms are not only stylish, but practical too!...Put them on your baby's bottle or your child's cup to easily tell them apart at the day care center.
Let us Monogram for YOU!...Contact us for pricing and more information.
Tuesday, April 15, 2014
We can cut for you...
Aren't these mini scissors so stinkin' cute?! A customer happened to see some wooden embellishments that we carry but she needed 20 pieces. Ellen whipped out her scissors die and cut a pair from silver foil cardstock, took a picture with her new iPhone, AND sent it in a message to the customer. For those of you who know Ellen, cutting paper comes naturally to her but technology drives her cRaZy! The customer loved them and placed her order. We love die cutting and would LOVE to cut your custom requests. If we don't have a die, we now have a Silhouette Cameo electronic cutter that will cut anything we tell it to. Let us know what we can cut for you...
Wednesday, April 9, 2014
Memorable trip to our favorite place...IKEA!
It was a beautiful day for a drive...except for the wind. Ellen needed to return a few things and invited me to go along. Of course, I never pass up a chance to go to IKEA. My favorite thing is to dream and plan for an organized craft room. Alex ALWAYS catches my eye. Yesterday, I discovered that Alex comes in several different models...oh my! Now I really have to save to get ALL of Alex! I LOVE all of the drawers! It is much easier to put things away when they belong in a certain drawer. Although I didn't see them, I hear that they even make dividers too.
This is NOT my craft room. But, it is a good picture that shows the different models. The tall piece retails for $119. In the showroom, they have two next to each other. You can Google or search on Pinterest to see other creative ways to use Alex in your creative spaces.
One of Ellen's favorites is this Rastog Cart. She finally got one and was excited to have a choice of colors. Up until yesterday, we have only seen the one in Robin's Egg Blue. I can't wait to see how she uses it in her new craft room. These sell for $59. We looked at a lot of carts and this one is much more sturdy than the rest.
We usually end our trip with treating ourselves to an ice cream cone before heading home. There are some benches that are close to the doors and the area where people take care of their returns. This is where we rest our feet while we enjoy our ice cream. We had just finished when all of a sudden Ellen let out a loud scream that got everyone's attention! She quickly looked down to see why the next bench was coming closer to her leg. At the same time, a guy that was returning a VERY HEAVY bed rail thought he was propping it up on the bench next to her. Next thing we heard was the scream from Ellen as it slid off the bench and into her shoulder and arm. Immediately the guy started "sweating bullets". He felt so bad and was very thankful that her injuries weren't worse. Eventually, when the initial pain and shock wore off, we were able to ease the situation with a few laughs. It was a memorable moment for all and we're all thankful that there wasn't any blood or broken bones! When it was all said and done, we had another fun day at IKEA and I can't wait until I can take Alex home with me!
This is NOT my craft room. But, it is a good picture that shows the different models. The tall piece retails for $119. In the showroom, they have two next to each other. You can Google or search on Pinterest to see other creative ways to use Alex in your creative spaces.
One of Ellen's favorites is this Rastog Cart. She finally got one and was excited to have a choice of colors. Up until yesterday, we have only seen the one in Robin's Egg Blue. I can't wait to see how she uses it in her new craft room. These sell for $59. We looked at a lot of carts and this one is much more sturdy than the rest.
We usually end our trip with treating ourselves to an ice cream cone before heading home. There are some benches that are close to the doors and the area where people take care of their returns. This is where we rest our feet while we enjoy our ice cream. We had just finished when all of a sudden Ellen let out a loud scream that got everyone's attention! She quickly looked down to see why the next bench was coming closer to her leg. At the same time, a guy that was returning a VERY HEAVY bed rail thought he was propping it up on the bench next to her. Next thing we heard was the scream from Ellen as it slid off the bench and into her shoulder and arm. Immediately the guy started "sweating bullets". He felt so bad and was very thankful that her injuries weren't worse. Eventually, when the initial pain and shock wore off, we were able to ease the situation with a few laughs. It was a memorable moment for all and we're all thankful that there wasn't any blood or broken bones! When it was all said and done, we had another fun day at IKEA and I can't wait until I can take Alex home with me!
Tuesday, April 8, 2014
Mini Ink Blending Tools - Just Listed...
This is the PERFECT tool for applying inks and paints with stencils...No more hard edges! Ranger and Tim Holtz introduced the Mini Blending Tool at CHA 2014. We have finally got them in and just listed this set as a bundle. You will receive 2 tools and 24 foam applicators. The one inch foam pads are just the right size to use with the new Mini Distress Inks too. https://www.etsy.com/listing/185601749/mini-ink-blending-tool-bundle-ranger-tim?
Monday, April 7, 2014
Yes, we do have a blog...
...and you can keep up with us by following Crazy Crafty Creators on www.bloglovin.com. It's easy and FREE! We were using Facebook to keep all of our CrAzY and CrEAtiVE friends inspired and informed...but that hasn't been working. FB seems to be limiting what our followers see in hopes that we will spend some money on advertising. Thanks to Ellen's friend Diny, we have learned about Bloglovin'. It's almost as fun as Pinterest! You can follow your favorite blogs and discover new ones. You will receive an email notification daily showing what has been posted. There's even an "app" for those of you who know how to use your phones. We promise that we are going to be more regular with our posting. You will find inspiring ideas and we hope to share tips and techniques as we learn them. Spread the word and invite your CrAfTy friends to join us and Bcrafty2!
Thursday, April 3, 2014
Spring is here...a time for new beginnings!
We're set up and ready to sell at the Premiere Market in Bryan, Texas. Come on out to the Expo Center and visit us. You won't be sorry you made the trip. There are lots of goodies for sale and it is a fundraiser for the Brazos Valley Symphony Orchestra.
It has been a CrAzY year...Ellen has finally moved in to her new house and is ready to share her craft room with her crazy crafty friends. We have decided that we are going to start blogging to keep everybody informed to what we're doing and post our class schedules You won't want to miss out! We used to count on FB to keep everyone updated, but that's not working anymore.
Our blog is actually at blogspot, but you can find us by going to bloglovin.com and look for Crazy Crafty Creators. When you sign up for bloglovin, they will let you know when we post something new. You can even download an app for your phone and follow all you favorite blogs on the go...whenever and wherever!
See you online!...
Friday, September 21, 2012
Repurpose, Re-use, and Recycle...
I have been collecting old beads for years, hoping to figure out what to do with them. With a little inspiration from the internet, these little vintage baubles have emerged from my "stash". I can't wait to put them to use. My head is spinning with ideas! At first, I created them to be centers for some flowers that I have in the works. Watching them bloom, I can envision them incorporated into some jewelry creations. Ellen and I are getting ready to take our wares out on the road. We have a couple of craft shows scheduled in the next few months, so we're going to be very busy! We'll keep you posted with our latest creations...ENJOY!
Thursday, September 20, 2012
Friday, September 7, 2012
Donna Downey and PanPastels...
I've really been enjoying Donna Downey's Inspiration Wednesdays videos. I know, its not Wednesday...
it doesn't matter...any day can be a day to CREATE!...
hope this inspires you...
Click HERE to go to the video.
For more inspiration from Donna Downey, the New Signature Series, brought to you by Scrapbook Trends and Northridge Publishing, is featuring Donna and her famous style and her love of creating. You'll find out what fabulous things she has been crafting lately and get loads of ideas for your future projects! The pages are full of stunning photographs, step-by-step instructions, and personal tips. Get ready to be inspired like never before!
![]() | ||||||
| (Click on the image to go to the Northridge Publishing Store) |
Here's one last picture that Donna posted today on Facebook...painted with PanPastel Colors.
Monday, September 3, 2012
Clay Embellishments with Dies and Stamps
This technique...brought to you by...Papertrey Inks...is sooo cool! They are using some of their coordinating stamp and die sets. This is a trend that we are seeing with a lot of the die companies so you can try this with any that you might have in your stash. But, you might be asking, "What if I don't have any?" Our suggestion would be to use any die shape that compliments your choice of stamp OR you could stamp your clay first and then free hand cut around the image....What are you waiting for?...Watch their video and go give it a try!

Click Here to watch the video => Clay Embellishments With Dies & Stamps
Saturday, September 1, 2012
Another PanPastel Video...
This is another Pan Pastel video that Ellen has posted. It is in Dutch...but a picture is worth a thousand words!...still worth watching how easy it is to work with!
Thursday, August 30, 2012
Ellen learns how to use a NEW product...
Before Ellen headed to Holland, she started "experimenting" with a NEW product that artists in Europe and the U.S. are starting to get excited about. Since she has been in her home country, she has spent a lot of time with her friend Diny. (Creadin.blogspot.nl) She has been sharpening her "coloring" skills with her Copics, concentrating on techniques doing hair and fabric folds and can't wait to share with us what she has learned.
While there, Ellen has caught that excitement that many artists and paper crafters have experienced when using one of the most popular products in the craft industry at the moment...PanPastel Colors. They come in concentrated cakes that are easy to use and can be incorporated into your artwork in many ways, depending on the application. Cardmakers are creating some gorgeous backgrounds and are accenting their diecuts with them. Art journaling and mixed-media artists are doing amazing things when applying these luscious colors into their masterpieces using their favorite tools and techniques.
Just what we all need...another craft obsession!
Tuesday, August 21, 2012
Cutting fabric using dies...
Lately I've been longing to "experiment" with stitching on my paper projects. My two most favorite obsessions are paper...and fabric. A true crafter never can have too much! Yesterday, I watched a video from Papertrey Ink that demonstrates how to cut fabric using your paper cutting dies. I never would have thought to stabilize the fabric with cardstock!
Now I can stitch fabric on to my paper projects with ease! ...I'm off to my stash to give it a try...
Monday, May 28, 2012
Cutting and embossing die cuts...
We are creating a lot of interest in our new paper cutting dies from Holland. This tutorial will demonstrate how easy it is to make your own beautiful die cuts using the Marianne, Leane and Cheery Lynn dies with your Sizzix Big Shot or Big Kick. When Ellen gets back from Holland I will find out her "recipes" using a Cuttlebug.
Supplies needed: Sizzix Big Shot or Big Kick machine, standard platform with flip tabs, pair of clear cutting plates, black silicone rubber pad, black hard plastic texture impression plate, any metal die and your choice of quality cardstock scrapbook paper.
1. Select a die that is designed to cut and emboss. Raised metal lines will cut out the paper and the flat, cut out areas on the die will emboss when using the silicone pad.
2. Choose your paper. Solid colors will work better when embossing. The raised texture that you add to your die cut might be hard to see when using patterned papers.
3. Cut your design first. Begin with the standard platform with all the tabs down. Place one of the clear cutting plates on top and lay your paper down in the center. Next, position the die on the paper with the cutting side down. Put the other clear plate on top of the die. Run this "sandwich" through the machine and back again.
4. Remove the top clear plate and extra paper that has been cut away. Keep your cut out piece in the die. Flip the die, with the cut in it, and leave it placed in the center of the bottom clear cutting plate. The cutting side of the die will now be facing up, ready to be embossed.
5. Set this aside while you adjust your platform. Flip Tab 2 out, towards you, and then place your clear cutting plate, with the die, on top of the platform.
6. Place the black silicone rubber pad (the soft, floppy one) on top of the die. Top it with the hard black plastic texture plate. This will complete the "sandwich" to be embossed.
7. Run this "sandwich" through the machine and back again.
8. Remove the black pad and plate and pop your embossed paper die cut out of the die.
Supplies needed: Sizzix Big Shot or Big Kick machine, standard platform with flip tabs, pair of clear cutting plates, black silicone rubber pad, black hard plastic texture impression plate, any metal die and your choice of quality cardstock scrapbook paper.
1. Select a die that is designed to cut and emboss. Raised metal lines will cut out the paper and the flat, cut out areas on the die will emboss when using the silicone pad.
2. Choose your paper. Solid colors will work better when embossing. The raised texture that you add to your die cut might be hard to see when using patterned papers.
3. Cut your design first. Begin with the standard platform with all the tabs down. Place one of the clear cutting plates on top and lay your paper down in the center. Next, position the die on the paper with the cutting side down. Put the other clear plate on top of the die. Run this "sandwich" through the machine and back again.
4. Remove the top clear plate and extra paper that has been cut away. Keep your cut out piece in the die. Flip the die, with the cut in it, and leave it placed in the center of the bottom clear cutting plate. The cutting side of the die will now be facing up, ready to be embossed.
***TIP*** When your cutting plates get marked up, you can avoid unwanted texture by placing a piece of VERY thin plastic down first. Computer transparencies work great. Using an additional clear plate that you have not cut with, will work also.
5. Set this aside while you adjust your platform. Flip Tab 2 out, towards you, and then place your clear cutting plate, with the die, on top of the platform.
6. Place the black silicone rubber pad (the soft, floppy one) on top of the die. Top it with the hard black plastic texture plate. This will complete the "sandwich" to be embossed.
8. Remove the black pad and plate and pop your embossed paper die cut out of the die.
Now you are ready to embellish your cuts. Try misting or inking the edges to enhance the raised areas. Maybe we'll try another tutorial to "spark" your creativity!...Stay tuned...
Check out our Etsy shop for the best selection of Dutch dies...at the best prices on the internet!
On Facebook, "LIKE" Crazy Crafty Creators...
You'll receive monthly "Coupon Codes" and "New Merchandise" alerts.
Tuesday, May 22, 2012
Ellen has gone to Holland...
I took Ellen to the airport yesterday so she could catch her plane back to her homeland. As we approached the terminal, I really wanted to be going with her. I love to travel. Because my Dad was in the Air Force, I traveled a lot growing up. But, I never got to go to Europe. Hopefully, some day, I will be able to go with her. Until then, I'll continue to listen to Ellen's stories and "dream" about the day that I will get to see it all for myself.
Although I'm looking forward to what she is bringing back for us, I know that this is not going to be an easy trip for her. It is time for Ellen and her brother to clean out their father's house. No one looks forward to dissolving their parents' estate. It will be a quick trip filled with a lot of hard work. May they find joy in completing this unpleasant task as they work together and travel down "memory lane".
Subscribe to:
Posts (Atom)